Customising AutoCorrect in Word: A Guide to Faster, Smarter Typing
Today, we're taking you through using AutoCorrects in Word. This is a feature that everyone uses, but not a lot of people know how to take full advantage of it!
So, AutoCorrects, what are they and how can I use them? 🤔
AutoCorrects in Word works like a built-in dictionary for corrections, with lots of common typos and mistakes or misspelled words already set up to fix automatically. It also has a bunch of functionality related to correcting (or not correcting) certain “mistakes”. You might have noticed when you mistype a word, it'll correct with the little yellow lightning bolt that comes up to tell you it's been corrected. ⚡
Access your AutoCorrect list – easily ✅
The easiest way to do this is:
- Start typing a word in Word, in lowercase, and letting it capitalise it.
- You can then select the lightning bolt, then choose ‘Control AutoCorrect Options’.
- You can also go ‘File’ > ‘Options’ > ‘Proofing’ > ‘AutoCorrect Options’… but who wants to do all that?!

AutoCorrect Options 👨💻
This will bring you to a bunch of different options. For today, we're going to focus on AutoCorrect – but feel free to have a look at some of the other tabs as well!
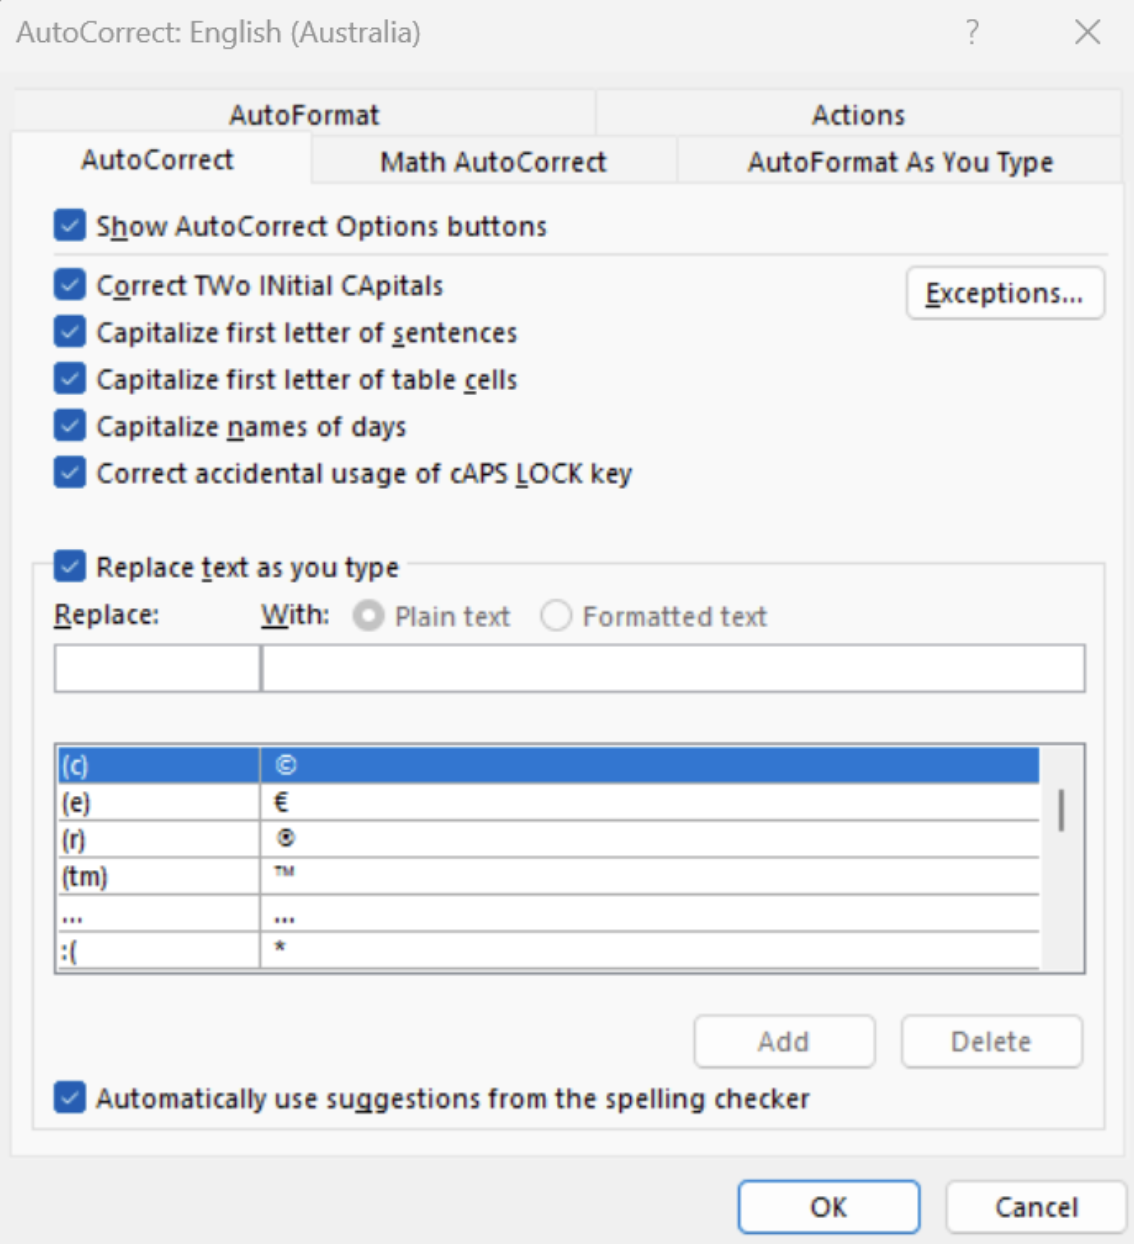
The first section has a number of selected options that logically make sense. However, these might be annoying in some cases!
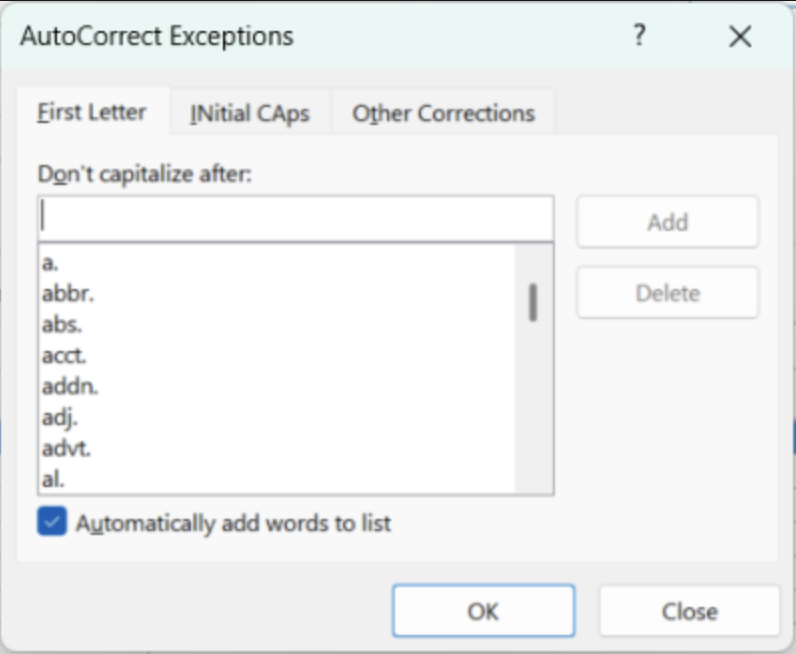
Adding exceptions 🙅
You can add exceptions here if there are certain things that keep getting corrected that you don't want corrected:
- Select the ‘Exceptions…’ button.
- Choose the relevant tab.
- Type it in and select ‘Add’.
Great! Any more shortcuts? We love shortcuts! 😍
The second section is where you can have some real fun. You'll see a table with a massive pre-loaded list. One of the best ways to use this option is by adding your own words, especially ones that you:
- Have trouble typing – although you remember how the word is spelled, you always type it wrong (we're guilty of this with SO MANY words)!
- Have difficulty spelling – no need to remember how to spell that tricksy word, add it as an autocorrect.
- Type all the time – this is where the real magic (in our humble opinion) is… you can use shortcuts!
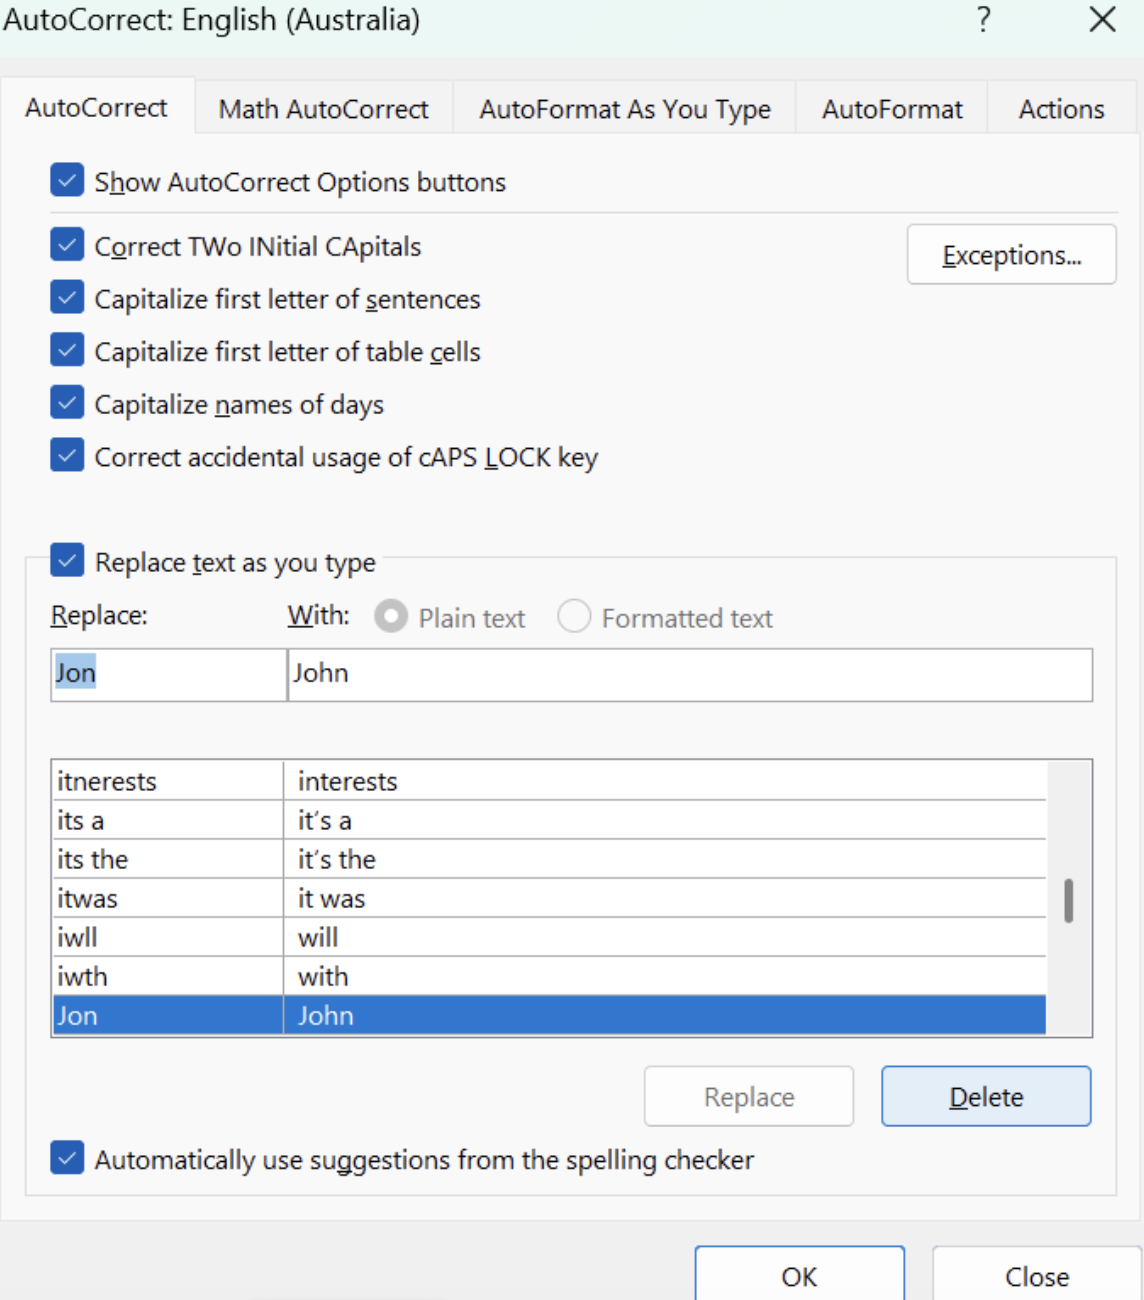
So for today's shortcut example, we'll be picking on actor John Krasinski. We love Dónall, but we find it difficult to spell his name correctly! So, what we've done is created a shortcut for his name!
- In the 'Replace' box, choose a meaningful shortcut – we've used “Jon” in this instance.
- In the ‘With’ box, enter a replacement – we've put “John”.
- Select ‘Add’, then ‘OK’ to close out of the Autocorrect settings.
- Your new AutoCorrect is ready to go!
To trigger your newly added AutoCorrects, simply type the shortcut(s) you used and press space. This is the trigger that Word uses to use the replacement word. Happy AutoCorrecting!
Pro tip 💡
If you use the same combination of words a lot, such as a company name or a phrase, you can add these as a single AutoCorrect! Massive time savings to be had!